Exercise
Power Clean: How to Do It, Muscles Worked
The Power Clean is a intermediate-level strength exercise that primarily works the hamstrings, with the calves, forearms, glutes, lower back, middle back, quadriceps, shoulders, traps, triceps as secondary muscles. It uses barbell, and is performed in 24 steps, following the form cues, common mistakes and sets/reps guidance below.
What muscles does the Power Clean work?
The Power Clean primarily targets the hamstrings, and also recruits the calves, forearms, glutes, lower back, middle back, quadriceps, shoulders, traps, triceps as secondary muscles. It's classified as a intermediate-level strength movement using barbell.
What are the most common Power Clean mistakes?
- Attempting technical loads before the receiving positions (front rack, overhead) are comfortable at lighter weight.
- Skipping a qualified coach or spotter when adding weight to a technical lift like this.
- Pulling the bar with the arms too early instead of driving it with the legs and hips first.
- Letting the bar drift away from the body instead of keeping it close through the pull.
How should I program the Power Clean — sets, reps and frequency?
As a technical, speed-dependent lift, it is trained differently from a standard strength movement: 1-3 reps for 4-6 sets at low-to-moderate loads. Because it demands fresh technique, it is best practiced 2-3 times a week rather than to failure. Add difficulty gradually — more load, more distance/time, or better technique — rather than rushing intensity.
What are good Power Clean variations and alternatives?
- Good Morning — barbell, intermediate level, hamstrings
- Romanian Deadlift — barbell, intermediate level, hamstrings
- Sumo Deadlift — barbell, intermediate level, hamstrings
- Sumo Deadlift with Bands — barbell, intermediate level, hamstrings
| Attribute | Value |
|---|---|
| Level | Intermediate |
| Equipment | Barbell |
| Category | Strength |
| Primary muscles | Hamstrings |
| Secondary muscles | Calves, Forearms, Glutes, Lower Back, Middle Back, Quadriceps, Shoulders, Traps, Triceps |
How to do the Power Clean, step by step:
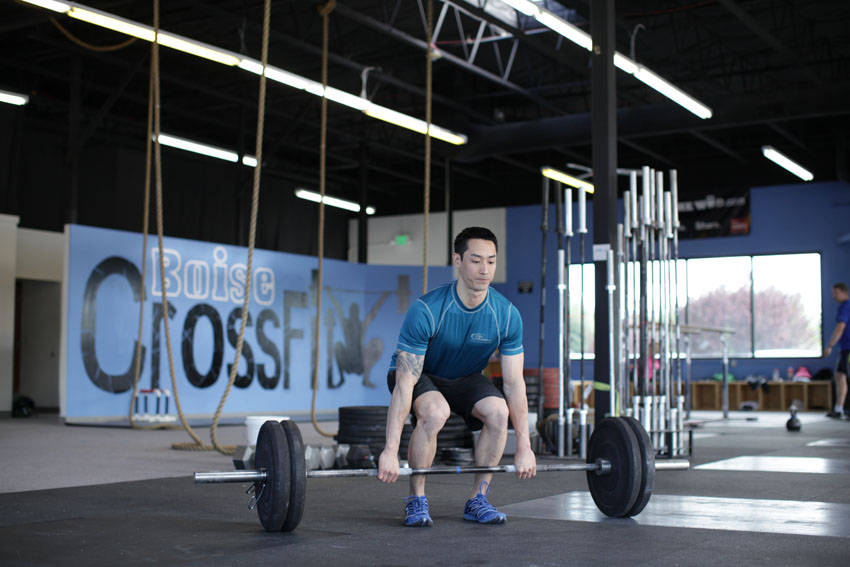
- Step 1. Stand with your feet slightly wider than shoulder width apart and toes pointing out slightly.
- Step 2. Squat down and grasp bar with a closed, pronated grip. Your hands should be slightly wider than shoulder width apart outside knees with elbows fully extended.
- Step 3. Place the bar about 1 inch in front of your shins and over the balls of your feet.
- Step 4. Your back should be flat or slightly arched, your chest held up and out and your shoulder blades should be retracted.
- Step 5. Keep your head in a neutral position (in line with vertebral column and not tilted or rotated) with your eyes focused straight ahead. Inhale during this phase.
- Step 6. Lift the bar from the floor by forcefully extending the hips and the knees as you exhale. Tip: The upper torso should maintain the same angle. Do not bend at the waist yet and do not let the hips rise before the shoulders (this would have the effect of pushing the glutes in the air and stretching the hamstrings.
- Step 7. Keep elbows fully extended with the head in a neutral position and the shoulders over the bar.
- Step 8. As the bar raises keep it as close to the shins as possible.
- Step 9. As the bar passes the knees, thrust your hips forward and slightly bend the knees to avoid locking them. Tip: At this point your thighs should be against the bar.
- Step 10. Keep the back flat or slightly arched, elbows fully extended and your head neutral. Tip: You will hold your breath until the next phase.
- Step 11. Inhale and then forcefully and quickly extend your hips and knees and stand on your toes.
- Step 12. Keep the bar as close to your body as possible. Tip: Your back should be flat with the elbows pointed out to the sides and your head in a neutral position. Also, keep your shoulders over the bar and arms straight as long as possible.
- Step 13. When your lower body joints are fully extended, shrug the shoulders upward rapidly without letting the elbows flex yet. Exhale during this portion of the movement.
- Step 14. As the shoulders reach their highest elevation flex your elbows to begin pulling your body under the bar.
- Step 15. Continue to pull the arms as high and as long as possible. Tip: Due to the explosive nature of this phase, your torso will be erect or with an arched back, your head will be tilted back slightly and your feet may lose contact with the floor.
- Step 16. After the lower body has fully extended and the bar reaches near maximal height, pull your body under the bar and rotate the arms around and under the bar.
- Step 17. Simultaneously, flex the hips and knees into a quarter squat position.
- Step 18. Once the arms are under the bar, inhale and then lift your elbows to position the upper arms parallel to the floor. Rack the bar across the front of your collar bones and front shoulder muscles.
- Step 19. Catch the bar with an erect and tight torso, a neutral head position and flat feet. Exhale during this movement.
- Step 20. Stand up by extending the hips and knees to a fully erect position.
- Step 21. Lower the bar by gradually reducing the muscular tension of the arms to allow a controlled descent of the bar to the thighs. Inhale during this movement.
- Step 22. Simultaneously flex the hips and knees to cushion the impact of the bar on the thighs.
- Step 23. Squat down with the elbows fully extended until the bar touches the floor.
- Step 24. Start over at Phase 1 and repeat for the recommended amount of repetitions.
Key takeaways
- The Power Clean is a intermediate-level strength exercise using barbell.
- Primary muscles worked: Hamstrings; secondary: Calves, Forearms, Glutes, Lower Back, Middle Back, Quadriceps, Shoulders, Traps, Triceps.
- A typical working range is 1-3 reps for 4-6 sets at low-to-moderate loads.
- The most common technical fault is attempting technical loads before the receiving positions (front rack, overhead) are comfortable at lighter weight.
Log the Power Clean in your next workout
Try IRONSLOG freeFrequently asked questions
Is the Power Clean suitable for beginners?
The Power Clean is listed as intermediate-level, so it's usually introduced after the basic barbell pattern has been learned with an easier variation.
What equipment do I need for the Power Clean?
A barbell. No other equipment is required for the standard version of this movement.
What's the difference between the primary and secondary muscles listed?
Primary muscles (Hamstrings) do most of the work and are usually the limiting factor in the set. Secondary muscles (Calves, Forearms, Glutes, Lower Back, Middle Back, Quadriceps, Shoulders, Traps, Triceps) assist or stabilize but aren't the main driver of the movement.